Residential Exterior Painting transforms houses, adding curb appeal and protecting the structure. This guide delves into every aspect, from market trends and service offerings to paint selection, application techniques, and post-painting care. We’ll explore the preparation process, crucial safety precautions, and even showcase stunning before-and-after examples of diverse projects, ranging from Victorian charm to modern minimalism.
Whether you’re a homeowner planning a refresh or a contractor seeking to refine your services, this comprehensive resource offers valuable insights and practical advice.
We’ll cover everything from understanding the current market demands and pricing strategies to mastering the art of paint application and ensuring long-lasting results. Learn how to choose the right paints, prepare surfaces effectively, and maintain your freshly painted exterior for years to come.
This guide aims to equip you with the knowledge to make informed decisions, resulting in a beautiful and durable finish.
Post-Painting Care and Maintenance: Residential Exterior Painting
Protecting your newly painted exterior requires careful post-painting cleanup and ongoing maintenance. Proper care will significantly extend the life of your paint job and maintain its aesthetic appeal. Neglecting these steps can lead to premature deterioration and costly repairs.
Post-Painting Cleanup and Material Disposal
Responsible cleanup is crucial after an exterior painting project. This involves the safe disposal of leftover paint, cleaning equipment, and removing debris from the work area. Leftover paint should never be poured down drains or into the trash.
Instead, follow local regulations for hazardous waste disposal; many municipalities offer designated drop-off locations for paint and related materials. For small quantities, you can sometimes allow the paint to dry completely before discarding it in the trash. Clean brushes and rollers thoroughly with appropriate solvents, following the manufacturer’s instructions.
Dispose of used solvents according to local regulations. Finally, remove all drop cloths, plastic sheeting, and other debris from the property, ensuring a clean and safe environment.
Maintaining the Painted Surface
Regular cleaning and inspection are key to maintaining the painted surface. For routine cleaning, use a soft-bristled brush or a pressure washer (on a low setting to avoid damaging the paint) to remove dirt, cobwebs, and loose debris. Avoid harsh chemicals or abrasive cleaners, which can damage the paint film.
Regularly inspect the painted surfaces for any signs of peeling, cracking, blistering, or mildew growth. Addressing these issues promptly prevents them from becoming larger, more expensive problems. For example, minor chips or scratches should be touched up immediately using the original paint color.
Mildew can be removed using a solution of water and bleach (follow the manufacturer’s instructions carefully).
Common Post-Painting Problems and Solutions
Several issues can arise after exterior painting. Peeling paint often indicates poor surface preparation or the use of inappropriate paint for the surface. Repainting may be necessary, but proper surface preparation is critical to ensure adhesion. Cracking usually suggests movement in the underlying substrate (e.g., wood expansion and contraction).
Addressing the structural issue may be necessary before repainting. Blistering often points to moisture trapped beneath the paint film. Proper ventilation and moisture control are essential to prevent this. Mildew growth is common in humid climates.
Regular cleaning and the use of mildew-resistant paint can help mitigate this problem. Finally, fading is a natural process, but choosing high-quality, UV-resistant paint can help extend the lifespan of the color.
Exterior Paint Maintenance Schedule
| Task | Frequency | Materials | Notes |
|---|---|---|---|
| Clean exterior surfaces (soft brush/low-pressure wash) | Twice yearly (Spring & Fall) | Soft-bristled brush, garden hose, mild detergent (optional) | Avoid harsh chemicals. |
| Inspect for damage (peeling, cracking, blistering, mildew) | Twice yearly (Spring & Fall) | None | Address any issues promptly. |
| Touch up minor scratches and chips | As needed | Touch-up paint | Use original paint color. |
| Clean mildew (if present) | As needed | Mild bleach solution (water and bleach), scrub brush | Follow bleach solution instructions carefully. |
Safety Precautions and Regulations
Exterior house painting, while seemingly straightforward, presents several potential safety hazards. Failing to address these risks can lead to serious injuries or even fatalities. Understanding and implementing appropriate safety measures is crucial for both the painters and those residing near the work area.
This section details essential safety precautions and relevant regulations to ensure a safe and compliant painting project.
Potential Safety Hazards Associated with Exterior Painting
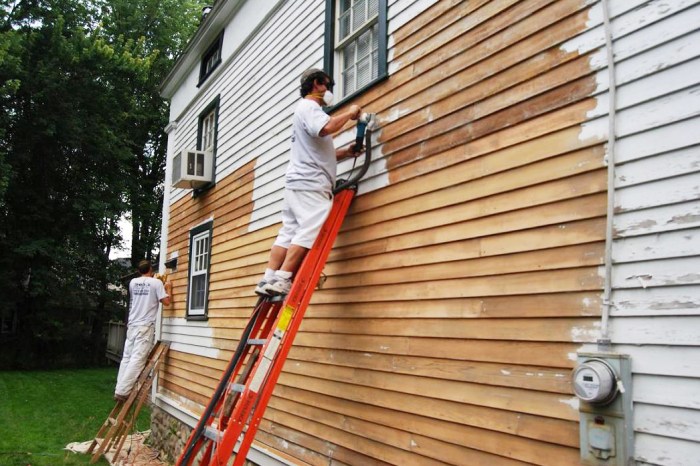
Working at heights is a primary concern in exterior painting. Falls from ladders, scaffolding, or roofs are a significant risk. Other hazards include exposure to hazardous materials like paint fumes, solvents, and cleaning agents. These chemicals can cause respiratory problems, skin irritation, and eye damage.
Additionally, electrical hazards exist when working near power lines or electrical outlets. Improper handling of tools and equipment can also result in cuts, bruises, and other injuries. Finally, weather conditions, such as extreme heat, cold, rain, or wind, can create hazardous working environments.
Importance of Proper Safety Equipment
Appropriate safety equipment is paramount to mitigating the risks associated with exterior painting. Respirators are essential for protecting against paint fumes and dust particles, reducing the risk of respiratory illnesses. Eye protection, such as safety glasses or goggles, shields the eyes from paint splashes, debris, and chemical exposure.
Gloves protect the hands from paint, solvents, and irritants. A hard hat is necessary when working at heights to protect against falling objects. Safety harnesses and fall arrest systems are crucial for preventing falls from ladders or scaffolding.
Appropriate footwear with good traction prevents slips and falls.
Notice Local House Painters Near You for recommendations and other broad suggestions.
Relevant Safety Regulations and Permits
Specific safety regulations and permit requirements vary by location. However, general guidelines often involve adherence to Occupational Safety and Health Administration (OSHA) standards, which emphasize fall protection, hazard communication, and personal protective equipment (PPE) usage. Many municipalities require permits for working at heights or near public spaces.
Before starting any exterior painting project, it’s essential to contact local authorities to understand and comply with all applicable regulations and obtain necessary permits. Failure to comply can result in fines and legal repercussions.
Safety Measures Checklist
Prior to commencing any exterior painting work, a thorough safety check is crucial. This checklist highlights essential safety measures:
- Inspect all ladders, scaffolding, and equipment for damage before use.
- Ensure proper fall protection measures are in place when working at heights.
- Wear appropriate PPE, including respirators, eye protection, gloves, and hard hats.
- Clearly mark work areas to warn others of potential hazards.
- Properly store and handle all paint and solvents, following manufacturer’s instructions.
- Ensure adequate ventilation to minimize exposure to paint fumes.
- Check weather conditions and postpone work if conditions are unsafe.
- Maintain a clean and organized work area to prevent accidents.
- Have a first-aid kit readily available.
- Familiarize yourself with emergency procedures.
Visual Examples of Residential Exterior Painting Projects

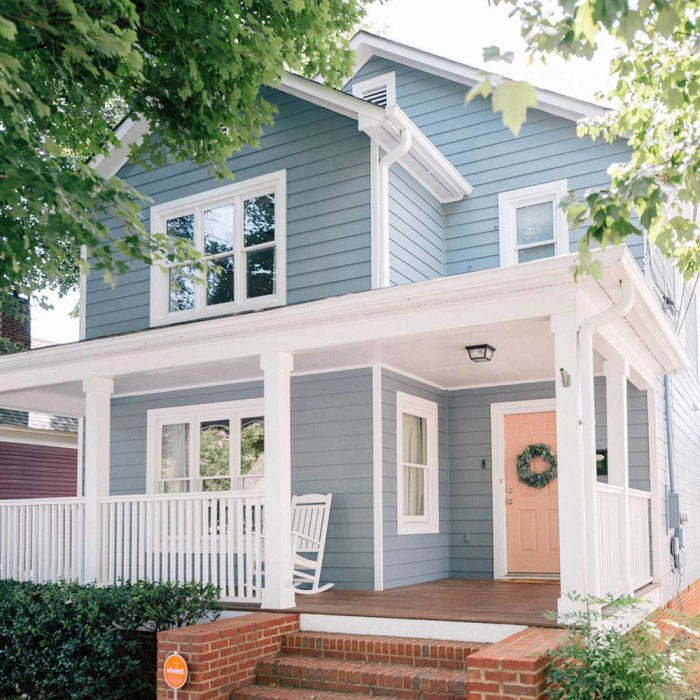
Transforming the exterior of a home through painting is a powerful way to enhance curb appeal, protect the structure, and reflect the homeowner’s personal style. The following examples illustrate diverse approaches to residential exterior painting, highlighting color selection, application techniques, and pre-painting considerations.
Victorian Home Exterior Painting Project, Residential Exterior Painting
This project involved a Victorian-style home characterized by intricate detailing, including ornate trim, gables, and bay windows. The original paint was faded and peeling, revealing the underlying wood. The initial phase focused on thorough surface preparation. This included scraping away loose paint, repairing damaged wood with wood filler, and caulking gaps to prevent moisture penetration.
After the repairs, the entire surface was primed to ensure optimal paint adhesion and to create a uniform base. For the main body of the house, a soft, muted sage green was chosen, complementing the home’s architectural style and creating a timeless aesthetic.
Browse the multiple elements of Top Home Exterior Contractors Near Me to gain a more broad understanding.
The intricate trim was painted in a contrasting, yet complementary, creamy white, enhancing the architectural details and providing a striking visual contrast. A high-quality exterior paint with excellent UV protection was used to ensure longevity and resistance to weathering.
The application technique involved meticulous brushwork for the detailed trim and a combination of brush and roller for the larger surfaces to ensure even coverage and a professional finish. The result was a beautifully restored Victorian home with a revitalized exterior that showcased its architectural charm.
Modern Minimalist Home Exterior Painting Project
This project featured a modern, minimalist home with clean lines and a simple façade. The homeowners opted for a bold color palette to make a statement. The primary exterior wall was painted a deep, saturated navy blue, creating a dramatic and sophisticated look.
This dark color was offset by crisp white trim around the windows and doors, accentuating the home’s geometric design. The contrast between the dark blue and the bright white created a striking visual impact. The paint used was a high-performance acrylic paint, chosen for its durability and resistance to fading.
The application process was straightforward, utilizing rollers for the large surfaces and brushes for the finer details. The clean lines and lack of intricate detailing made the painting process relatively quick and efficient. The result was a modern and visually stunning home with a bold color scheme that reflects the homeowner’s contemporary taste.
Weathered Older Home Exterior Painting Project
This project involved a weathered older home showing significant signs of age and neglect. The exterior was covered in peeling paint, damaged siding, and rotting wood. Before any painting could begin, extensive repair work was necessary. This involved replacing damaged siding, repairing or replacing rotting window frames, and addressing any structural issues.
Significant areas of wood rot were carefully excavated, treated with wood preservative, and filled with appropriate wood filler. Once the structural repairs were completed, the entire surface was meticulously cleaned to remove loose paint, dirt, and debris. A thorough inspection revealed the need for some minor patching of stucco and mortar.
Once the repairs were complete and the surfaces were primed, the house was painted using a light, neutral beige color that created a sense of warmth and understated elegance. The color choice helped to minimize the appearance of imperfections while still providing a fresh and inviting look.
The result was a complete transformation, showcasing how careful preparation and repair work can restore the beauty of an older home and prepare it for a fresh coat of paint.
Final Conclusion

Successfully completing a residential exterior painting project requires meticulous planning, skillful execution, and a keen eye for detail. From understanding market dynamics and client needs to selecting the appropriate paints and employing safe application techniques, each step contributes to a final product that enhances property value and aesthetic appeal.
By following the guidelines and best practices Artikeld in this guide, both homeowners and professionals can achieve stunning results while ensuring the longevity and beauty of their exterior paintwork. Remember, a well-executed paint job is an investment that pays dividends in curb appeal and property value for years to come.
Answers to Common Questions
How long does exterior house painting typically take?
The duration varies depending on the house size, surface condition, and weather. Smaller projects might take a few days, while larger ones could extend to several weeks.
What is the best time of year to paint the exterior of a house?
Spring and fall generally offer ideal temperatures and less humidity, resulting in optimal paint drying conditions. Avoid extreme heat or cold.
How much does it cost to paint the exterior of a house?
Costs vary widely based on house size, surface preparation needs, paint quality, and labor rates. Getting multiple quotes from reputable contractors is recommended.
Can I paint my house myself?
While possible, DIY exterior painting is labor-intensive and requires specific skills and safety precautions. Consider the scope of the project and your experience level before deciding.